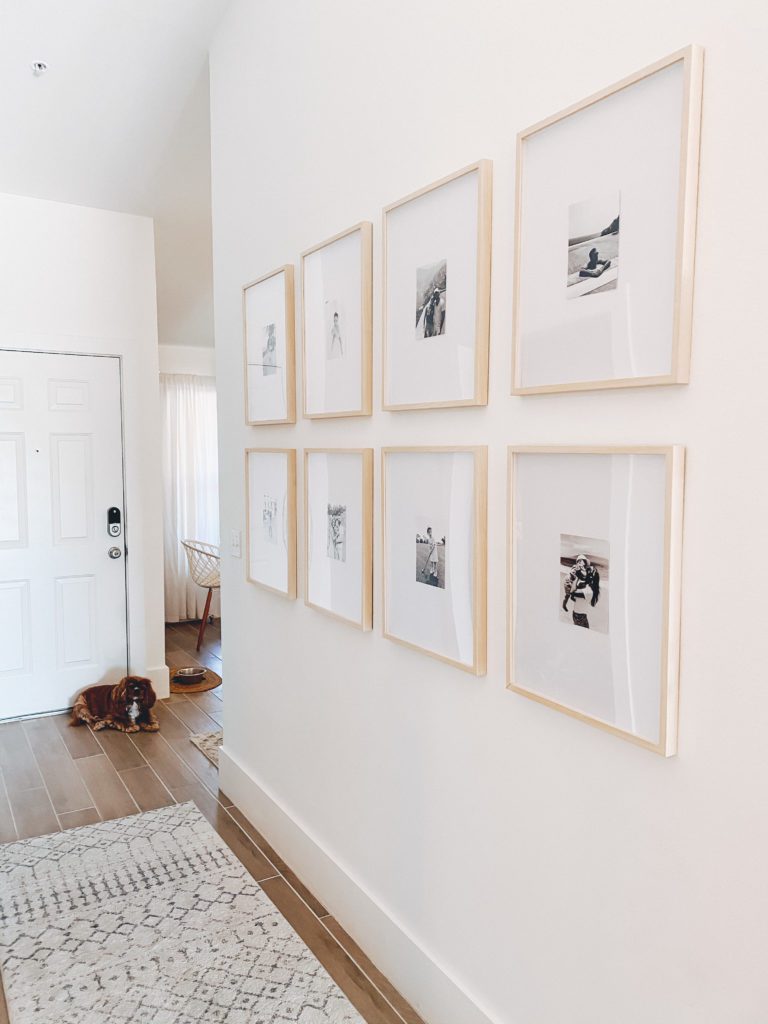
How to Create a DIY Gallery Wall
Gallery walls are so beautiful and I have loved seeing them sprout up around the Internet lately. It is a great way to showcase a lot of family photos all in one place while still creating a nicely designed space. We filmed a video about how to create a DIY gallery wall and you can check it out here. Instead of ordering a whole kit, we ordered the frame set we liked, white matting, and then manually measured and hung the frames. This will save a lot of money as the gallery wall kits can be super expensive!
We decided that a nice neutral gallery wall would be the perfect addition to our home. We wanted to originally put them in the playroom or above the couch but decided to put them in the entryway as it would fill that wall space nicely. Additionally, we knew we would want to have enough space to show off the pictures and space them out properly. So, we picked these frames from IKEA linked here, because we loved how the frame was super neutral and large.
For the matting, I created the look myself. Deciding to create a DYI gallery wall was definitely the way to go. We picked matting that would create a lot of white space for our 5 by 7 photos. We wanted there to be a lot of white surrounding each picture because it gave it a very nice clean look, which was exactly what we were looking for in this space. I bought the matting from Amazon. It came in whole sheets, the size of our frames, but without a hole in it for the photos. So, I just used double-sided tape to tape the photo into the middle of the matting. Then we inserted the matting with the photo into the frames. It was pretty easy to do!
To hang the photos, we measured out on our wall where to place each of the frames. We hung them from left to right and top to bottom. This part takes a little patience!
Then you are done, and have a beautiful gallery wall to enjoy!
get the good news


